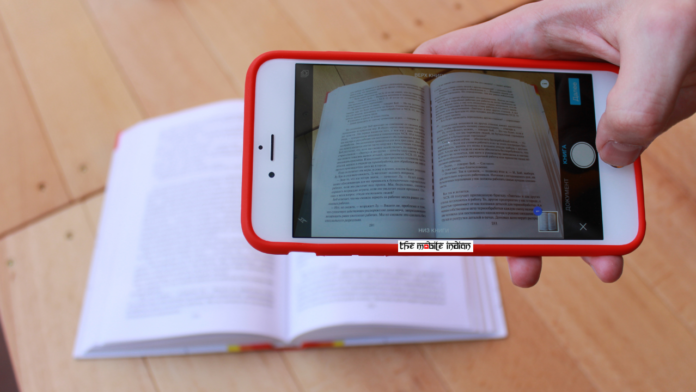
If you need to sign a document but don’t have a printer handy, you don’t need to worry! Here’s how you can scan and sign documents on your Apple iPhone in just a few simple steps.
When you’re scanning a document, it’s best to put it on a contrasting background. This will make your document easier for your iPad or iPhone to scan and differentiate from the background. For example, scan white pieces of paper on top of dark wooden tables.
How to Scan Documents on iPhone?
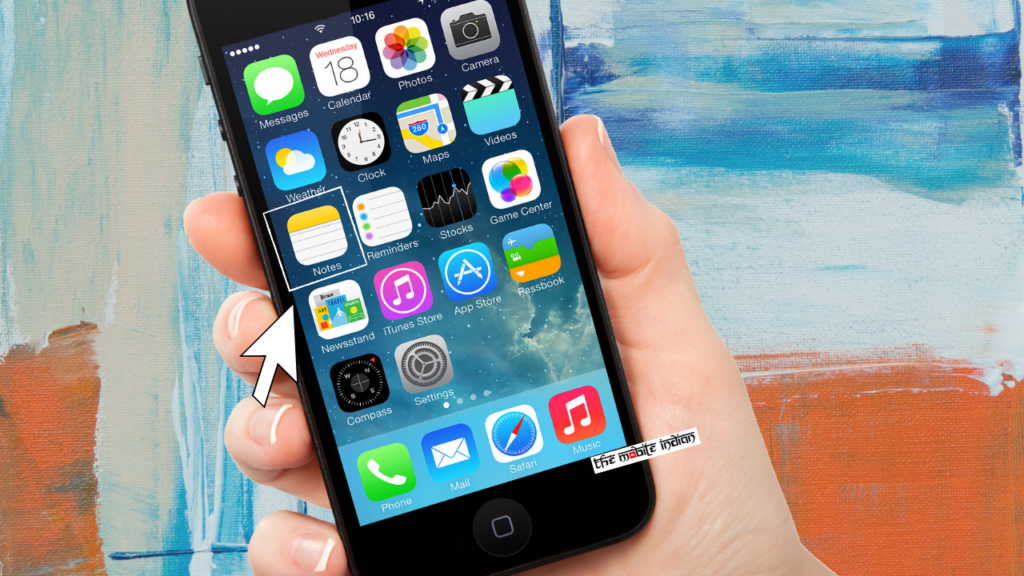
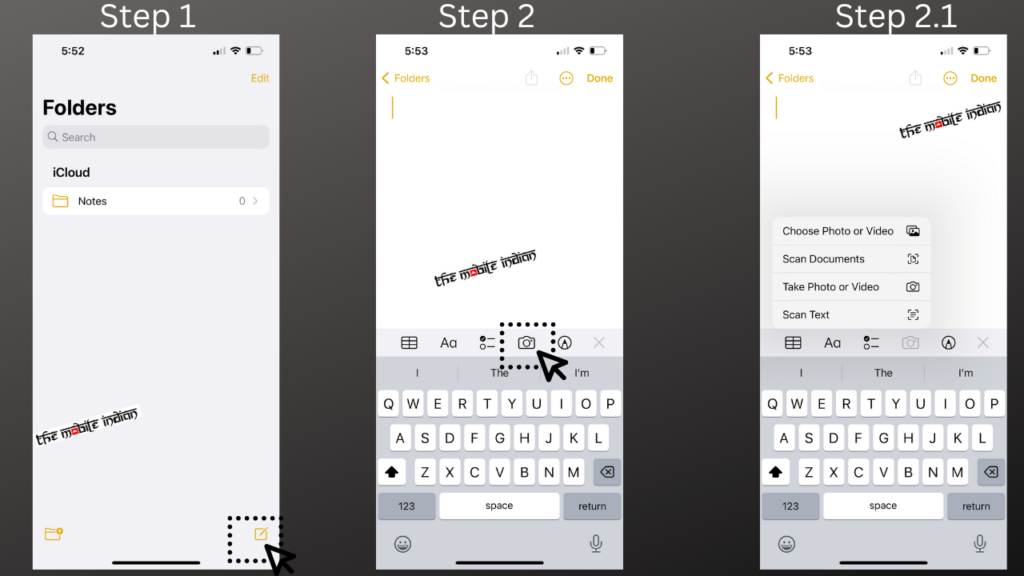
Step 1: You can start by opening the Notes App on your phone and clicking the pen icon on the bottom right corner of the screen.
Step 2: Click on the Camera icon and then click Scan Documents to scan your documents.
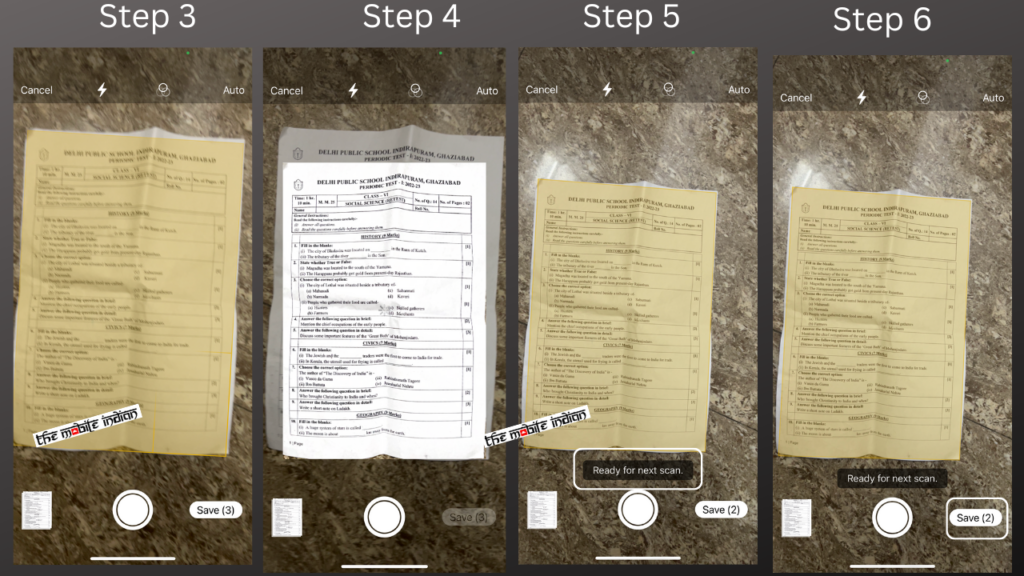
Step 3: Put your document under the iPhone or iPad’s camera lens. Within a few seconds, a highlighted box will appear around it. If it doesn’t scan right away, you can hit the shutter button or one of the volume buttons to snap the photo.
Step 4: Click or drag each corner of the scanning box to line it up so that just the document is captured and not anything else in the background.
Step 5: Say you’re scanning a multipage PDF and want to turn it into separate files. You can keep scanning one page after another so that only one file is created instead of creating multiple ones.
Step 6: You can press save once you’ve finished scanning your document.
Read More:
How to add videos, GIFs and photos in a single tweet?
How to convert PDF into Word docs on Windows, Mac, Android & iOS?
How to edit scanned on iPhone?
You just scanned your document. Now you can do a variety of things with it, such as renaming, exporting as a PDF, printing, and more. Here’s how to do that.
Rename document: Tap the file name on the top of the scan.
Add Page: To add a page to your document, tap the + icon on the bottom left of your screen. You can also crop your document by tapping the rectangular crop icon. This will open a four-point cropping box with round magnifying glasses that will help you to crop it exactly.
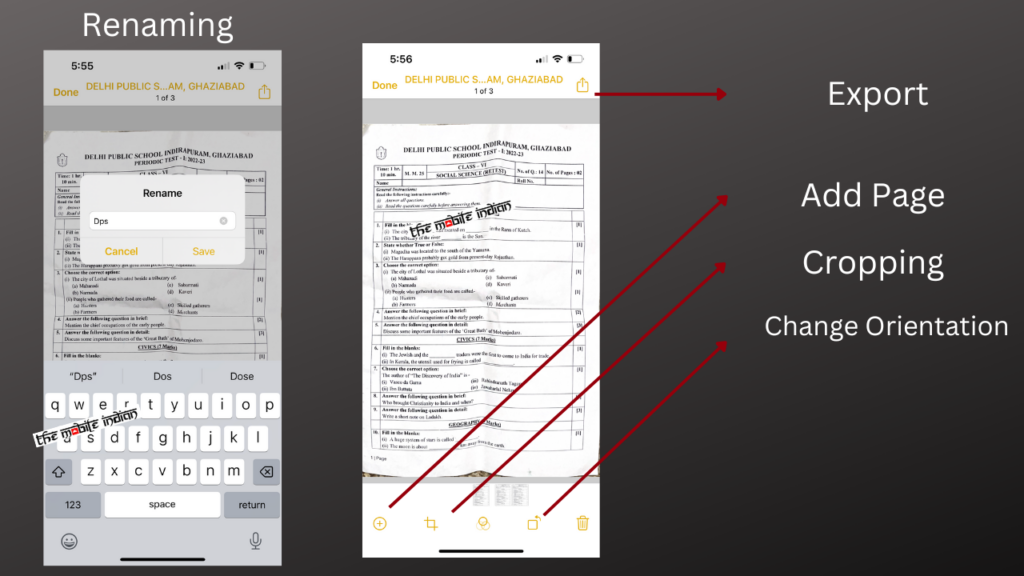
Change Orientation: To adjust the orientation of your document: Select the rotation icon in the bottom right-hand corner of your screen to change the orientation.
How to send a document: Click on the Export button in the top right corner of the scanner. When you’ve selected Export, you’ll also see other options for how you want to use it–print, mark up, copy, share or save.
How to sign a scanned document on iPhone
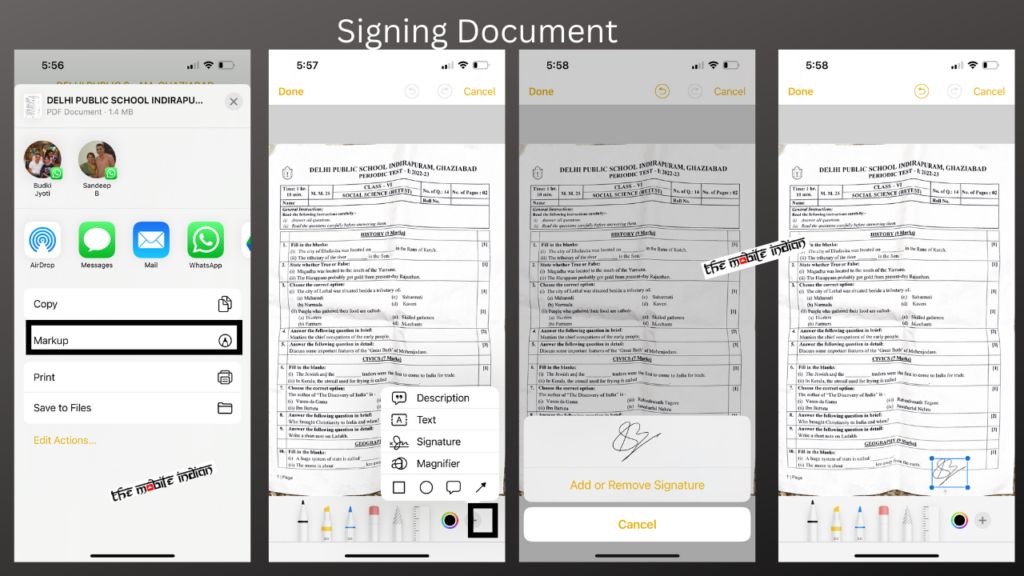
To add a signature while exporting: Tap the “Mark Up” option and click the “+” button at the bottom right. Click on Signature and then select the desired save location for your signature. You can adjust the size of your signature and place it wherever you want on the document.
Take away
This article has shown you how to use your iPhone to scan and sign documents, which can be a huge time-saver. Whether you’re scanning a document to email or fax, or you need to sign a contract on the go, this guide will help you get it done quickly and easily. Give it a try the next time you need to scan or sign a document and see how much simpler your life can be.


