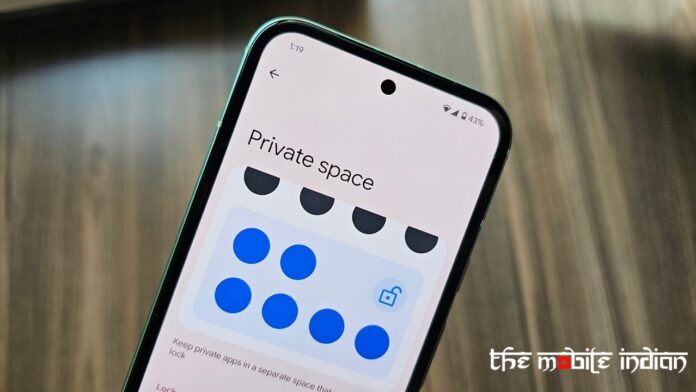
Google wrapped up its I/O 2024 annual event a couple of weeks back and introduced the Android 15 Beta 2 for Pixel smartphones which brought a new feature with it called Private Space. While its a clear inspiration of Samsung’s Secure Folder feature, the new Private Space on Pixel devices running Android 15 Beta 2 or later allows for enhanced privacy for users if they want to store their personal stuff under an additional layer of security, away from prying eyes. Here’s how you can turn on the feature.
What is Private Space in Android 15?
Private Space allows users to create a separate space on their device where they can keep sensitive apps away from prying eyes, under an additional layer of authentication. It uses a separate user profile. When private space is locked by the user, the profile is paused, i.e. the apps are no longer active.
The user can choose to use the device lock or a separate lock factor for private space. Private space apps show up in a separate container in the launcher, and are hidden from the recents view, notifications, settings, and from other apps when private space is locked. User generated and downloaded content (media, files) and accounts are separated between the private space and the primary space. The system sharesheet and the photo picker can be used to give apps access to content across spaces when private space is unlocked.
How To Enable Private Space?
The steps to enable Private Space on Pixel devices are as follows. However, do note that you need to have Android 15 Beta 2 or later installed on your device to get this feature to work. If you want to install the beta update, we have a guide for that too. Coming back to the steps to enable Private Space:
Step 1
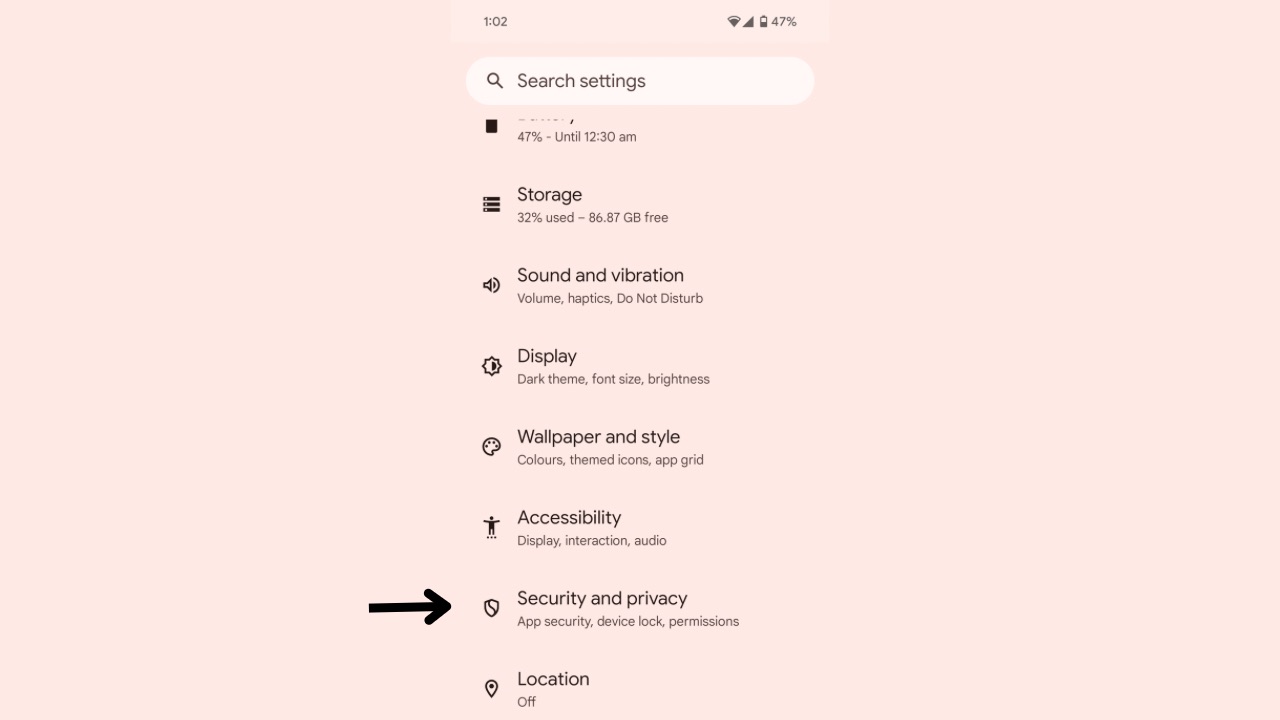
Open the Settings App on your Pixel device and head over to the “Security and privacy” section.
Step 2
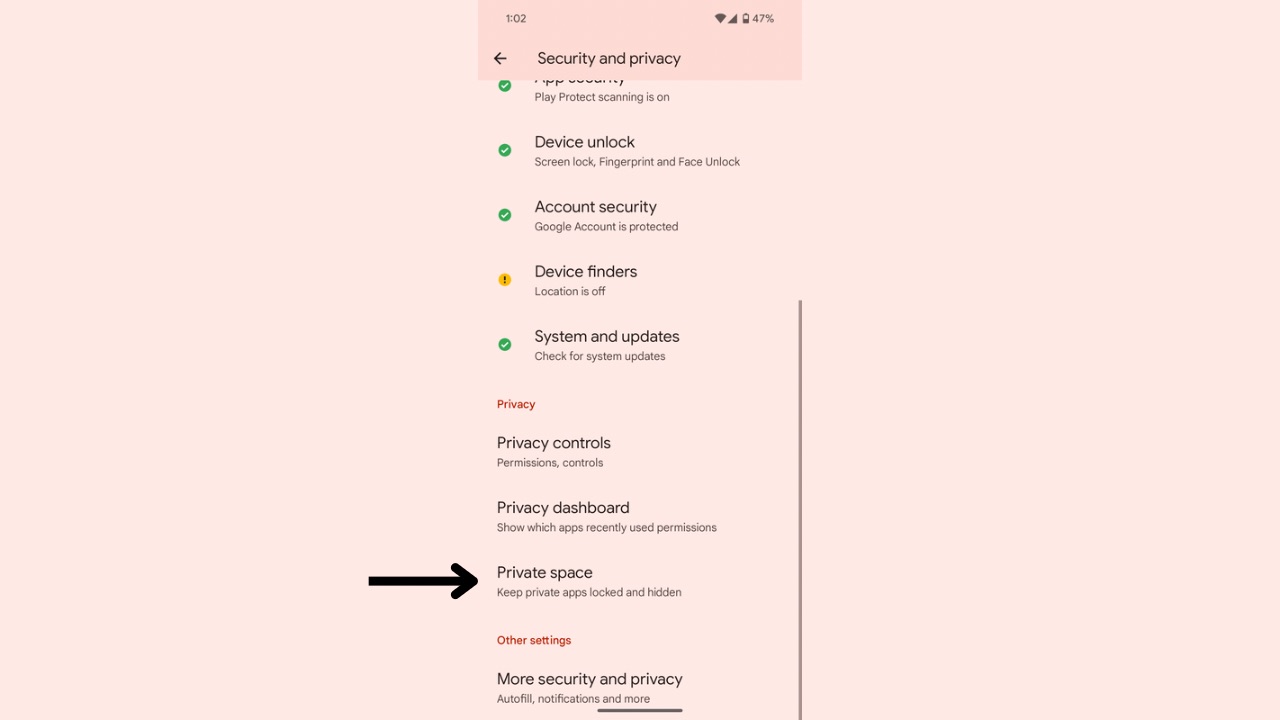
Scroll down and tap on “Private Space”. Scan your fingerprint next.
Step 3
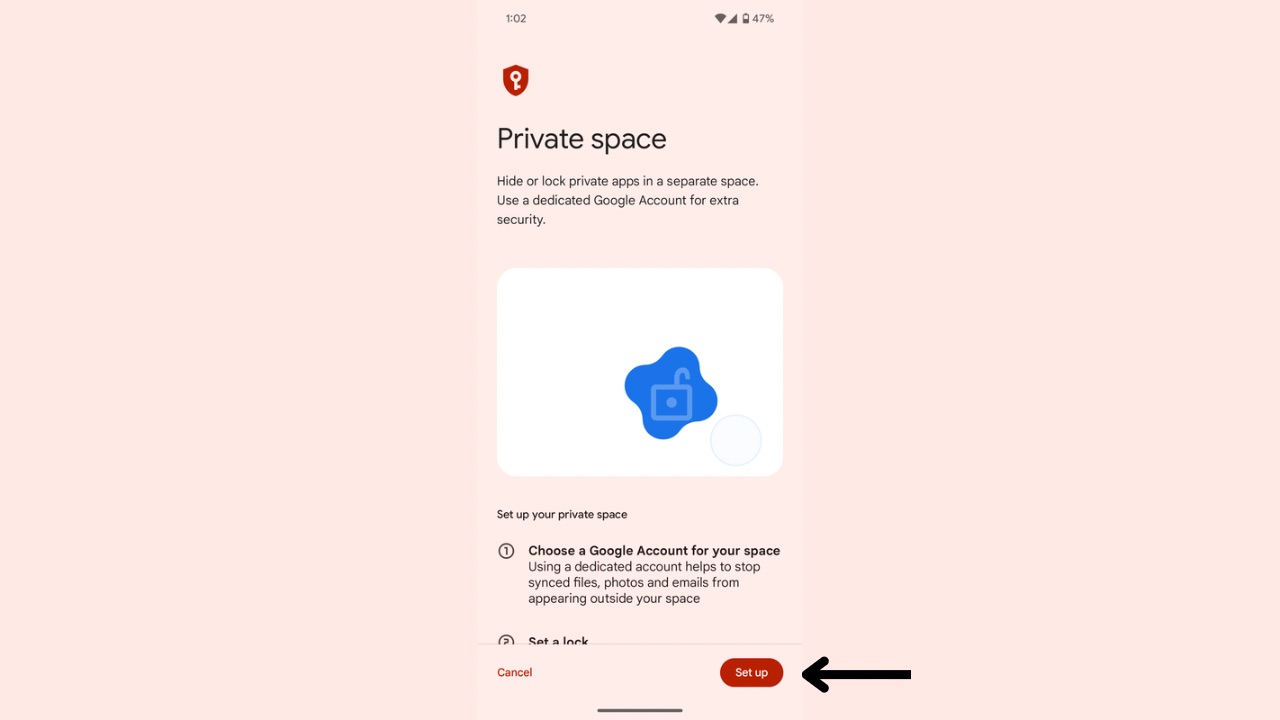
Now, click on the “Set up” button at the bottom right.
Step 4
Wait for the process to finish. Once done, tap on “Got it”. Next, add the Google Account of your choice.
Step 5
Then, you need to choose a new lock for your Private space. It can be a different one from your regular screen lock or the same. Once you have set it up, tap on “Done”.
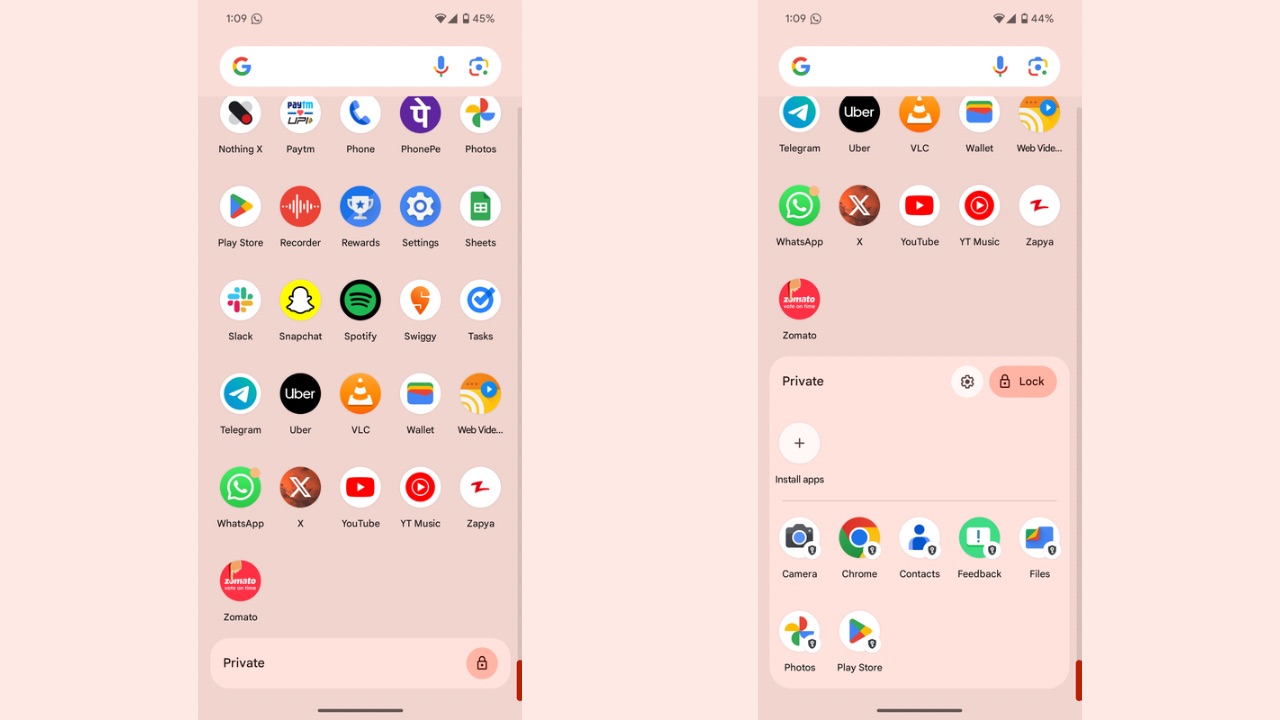
Now, you have successfully created your Private Space. You can access it by scrolling down to the bottom in the App drawer and then tapping on “Private”. Not only that, but you can also hide it from the app drawer by going to Private Space settings. That way, you’ll only be able to access it by typing Private Space in the search bar.


