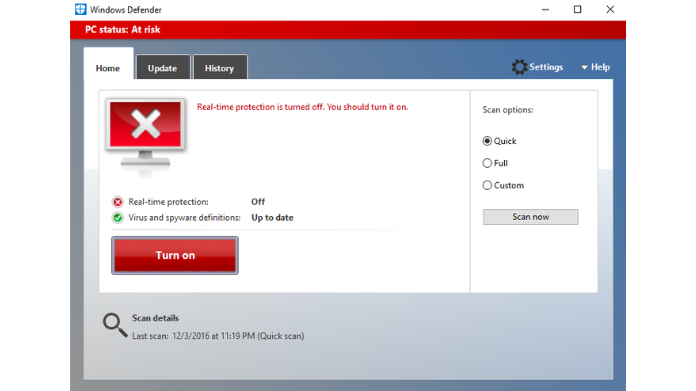
In the more recent versions of Windows 10 and Windows 11, Microsoft Defender Antivirus is now known as the Windows Security app. Microsoft Defender does a good job of protecting your computer from viruses and other security threats, but there may be times when you need to turn it off.
The first version of Windows Defender was released in 2006 as an anti-spyware tool. In 2009, Microsoft released a new version of Windows Defender that included anti-virus capabilities. The program has been continually updated since then and offers comprehensive protection from various malicious software. It gained more widespread popularity with the release of Windows 7 in 2009, when it was enabled by default.
It has been included as part of Windows 8, Windows 8.1, and Windows 10. Windows Defender is enabled by default and runs in the background, monitoring the system and alerting the user if it detects malicious activity. It also offers real-time protection, which means it can detect and remove threats as soon as they appear.
Cases Where Microsoft Windows Defender has to be Disabled
- When installing third-party antivirus software, Microsoft Windows Defender needs to be disabled to avoid conflicts with other security programs.
- Windows Defender may interfere with their operation when running certain programs, such as system utilities and certain games, so it needs to be disabled.
- System administrators may want to disable Windows Defender in order to deploy their own security solution across the organization.
- In some cases, Windows Defender may cause excessive CPU or RAM usage, so it needs to be disabled to improve system performance.
- If users are experiencing frequent false positive detections from Windows Defender, it may be necessary to disable the program.
Read More:
Microsoft’s AI Push: Office Suite to Get a Makeover with ChatGPT-Like Technology
Microsoft’s AI Push: Office Suite to Get a Makeover with ChatGPT-Like Technology
How to Disable Microsoft Defender Real-time Antivirus Protection
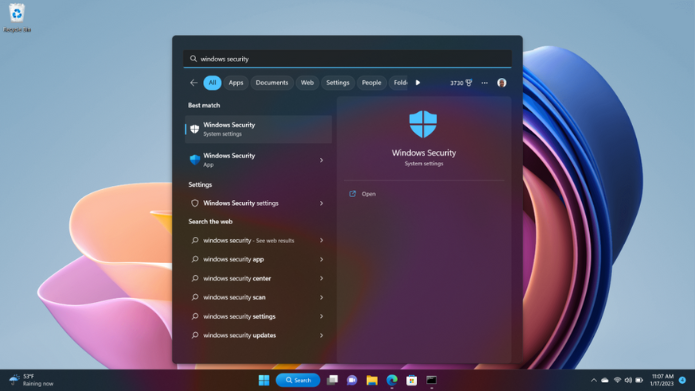
Step 1: Locate the Windows Security application by clicking on the Start button.
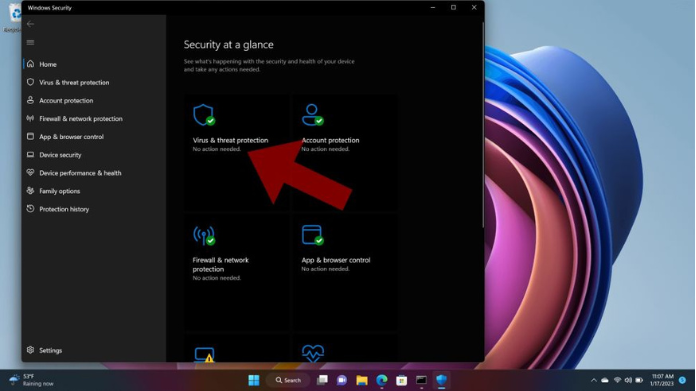
Step 2: Choose Virus & threat protection from within the Windows Security application.
Step 3: Under Virus & threat and protection settings, click Manage.
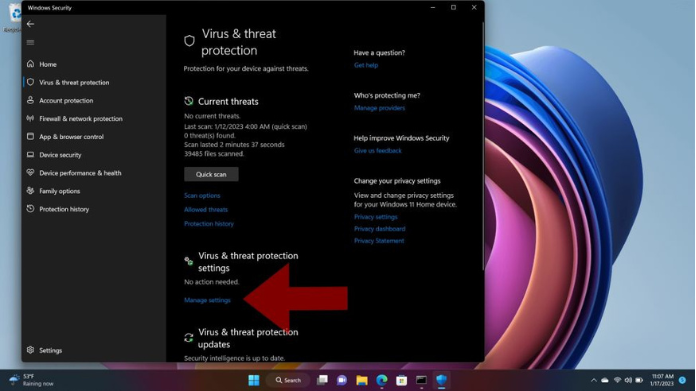
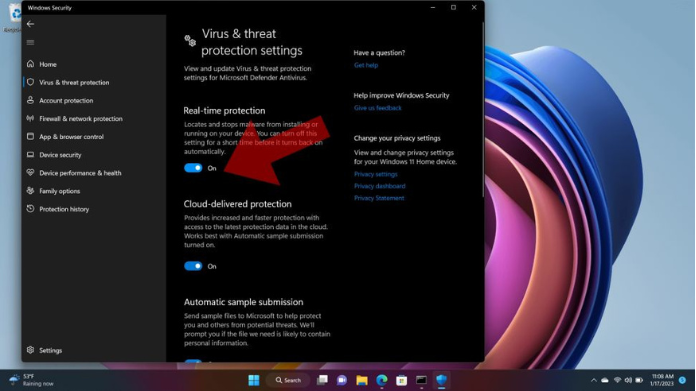
Step 4: A Real-time protection button will be visible; click it to disable it.
Step 5: When Real-time protection is disabled, a red X and a notification informing you that your machine is exposed to assaults will appear.
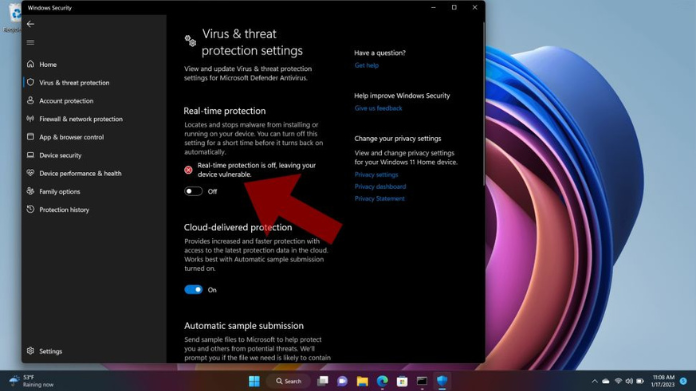
With that in mind, real-time antivirus protection is only momentarily disabled. Microsoft cautions that when real-time protection is off, potentially hazardous apps and files downloaded from the Internet are not checked.
Just in case you need to disable Microsoft Defender permanently, and not just the real-time antivirus function. There’s another way by installing a third-party antivirus security suite that will automatically put Microsoft Defender on the back burner.


